Why are my drawers a nightmare to keep tidy?
The wardrobe challenge was a complete eye-opener for me. My wardrobe was now behaving itself perfectly. Instead of working against me, it was supporting me in life now. I am really not kidding when I say it changed my life and it saves me time every day. This is my easy wardrobe, easy mornings and easy life. Because of this I decided not to stop there.
If you haven’t read my wardrobe challenge yet, you can read it here
I really do wish I could say the same about my chest of drawers though. I feel pain every time I use them. What is it with our chests of drawers? Are they destined to always be a bit of a mess? Why are so many sets of drawers just not working in our lives? I don’t recall any warning signs when I bought my current set of drawers. In fact it was quite the opposite. I do remember being overjoyed in the store as I listened to the assistant promise me that drawer storage heaven could be mine and I quickly handed over my cash to show I was in. I couldn’t wait to get them home either, because storage solution heaven was finally mine. I did get home and I filled my new chest of drawers with all my things to symbolize the beginning of my super organized new life, but 12 months later I was not living the life I was promised. My drawers had become a complete nightmare and they often like to conspire against me. So what happened? Why did these life changing drawers quickly join the same painful and overstuffed team as my wardrobe? One day I even stopped fighting them and began to ignore the mess in them too. This is how they became known as my nightmare drawers.
With one victory already under my belt, in the shape of a well tamed and obedient wardrobe, I was no longer willing to accept defeat and I was not messing about this time. I eyed my chest of drawers with steely intent. I was coming for them next and this time there would be no half measures because this time I meant business.
The two things I really hated the most about my drawers were the mess I made taking anything out and the increased mess I made putting anything back. This is why I always called them my ‘nightmare drawers’. The new goal was to remove all the hassle that these drawers gave me every single day. I wanted the same amazing results I now had with my wardrobe, so these nightmare drawers had to go. Let’s have a look at a quick guide to give you an idea of how I got started:
Step 1 – Before you get started
Think about your current bad drawer habits
- Drawers do not usually have the same capacity as wardrobes so great news, it should not be quite as much of a challenge to fix. Like the wardrobe challenge I was still looking for something manageable and well within my skill set and time frame.
- I don’t think there had ever been any kind of real plan going on in any of my drawers and this is probably why they had all taken on a life of their own now.
- Generally speaking, I think they all had a mix of a mess and they were all equally overstuffed and extremely disorganized inside.
Step 2 – Know what you own
Why it’s important take a good look
- It’s important to know what you own and what you will be dealing with from the start, so you can manage your time and avoid taking on to much at once.
- To start with I needed to have a really good look in each drawer and determine what exactly was going on in there.
- If you are not sure what you have, you might struggle to create a set of successful drawers that really work for you. So take a good look inside each one and think about what you have.
- I had no real order going on in any of mine and I hadn’t stopped to think about how I really needed them to support me in my daily life. If I was going to create less mess, I had to get away from my current ‘stuff it in and close the drawer quickly’ method that was clearly not working at all. These are the questions to help you understand your drawers’ use and determine what you need fixing:
Know what you wear – Time to be honest with yourself
As creatures of habit, our clothes generally fall into a few short categories and it’s when we lose sight of these few important categories that we start to hoard unnecessary items. The main reason we hang on to unnecessary items is money that has been spent on items we have not worn. There is a natural fear in the acknowledgement of any regretful purchase. Loss of money and error in judgement can spur us to keep things far longer than we need to. How often have you kept something because there is a very slim chance that we might wear it just once and then the money would not be wasted? It appears that we would rather hoard an item for years in the hope of wearing it once, than address or recognize the bad purchase in the first place. But here is the funny thing. If you reset your wardrobe so it is working for you and you learn how to make better choices then you are almost never going to be in that position again. Wouldn’t that be great? There is no more fear, there is no regret, and you have everything you need. You find you wear everything you have and you waste far less money this way. You will also know exactly when to replace things you wear often and you will always know when you really need something new. This is the key to an easy life, less money wasted and much, much less clutter. This is why it is so important to recognise what you actually wear all the time. It will help you understand how you should really be buying things. Below I have listed some categories for the items I currently own:
Basically, you want all your regular items to fit into the top category. This is how you save time in the morning, how you reset your wardrobe, and how you get rid of all the other categories that are just things hanging around taking up much needed space.
Step 3 – Getting ready (Part 1)
Knowing your new needs
Remember we want to think about creating a nice easy to use storage space in a nice amount of time that suits you. After sorting my wardrobe out I decide to use the same time planner method. This method really helped me allocate the correct amount of time for what I wanted to achieve with my wardrobe, so it made sense to use it again here. I have re-listed the plan and made a few relevant adjustments, but if you need to tweak it a bit to fit your needs, go ahead.
These times are a general guide, so please adjust according to your own drawer sizes and the speed at which you think you can complete each one.
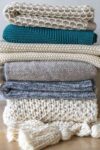
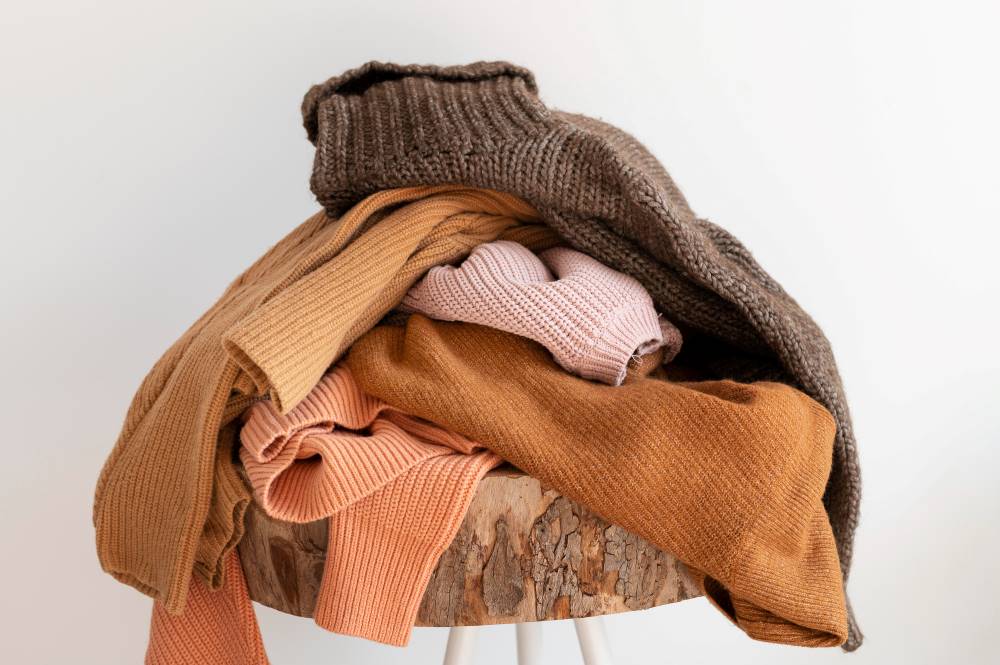
I was sorting my drawers out in autumn/winter so I had lots of bulky jumpers to go through and lots of summer wear to put away. Again, I went for the professional level, as I thought I could allocate enough time in one go.
Step 3 – Getting ready (Part 2)
Make a new plan
If your drawers have no particular plan like mine, creating a new one and thinking about what you use and need the most is really going to help you get them sorted so they work for you. Each drawer should be allocated one frequently-used and staple item to start with. This is going to help you see what you need the most and ensure you have easy access to it at all times. The staple item plan will be a major time saver in your regular morning routine. If you can’t grab what you need quickly, then your drawers are not working for you right now.
I had four medium sized drawers and I re-planned them in the following manner. The plan will help you focus on getting your drawers in order quickly and ensure you stay focused. My new staple categories for each drawer are listed as follows, but do make sure your plan fits your needs and life. You want easy reach for only what we wear and need every day.
My new staple item drawer plan
- Drawer 1 – Underwear
- Drawer 2 – Gym Wear
- Drawer 3 – Nightwear
- Drawer 4 – Jumpers

There was a very good reason I gave myself only four staple categories. I wanted to see how much of each main category I had and the miscellaneous items I had left. Setting yourself one category per drawer at the start will also help you see if you have too much of any category, which will help you declutter for an easy life too. I selected my most-used items to go at the top so that I could make sure they were all within easy reach first thing in the morning.
Step 4 – Final prep
Start the magic declutter
Because I was decluttering just like my wardrobe, I decided to employ the same ‘wardrobe challenge’ bin bag categories here as well. You want a good system with clear categories to help you quickly decide what is to keep and what is to give away. I knew I wanted to get rid of everything I no longer wore and everything I no longer needed, just as before, so I bought the same set of bin bags in the same colours to help me achieve this in preparation for my declutter day. As a little reminder these bin bags are to keep everything separated and ensure that I made no further mess as I sorted through each drawer. Having this strategy from the start guaranteed that I could work through my drawers swiftly and in the time I had allocated. I have listed my categories below gain help you out:
- Orange bin bag – for items that are no longer wearable and past their best
- Blue bin bag – for items still wearable but you no longer want
- Grey bin bag – for items that have never been worn and you are never going to.
The last thing I had left to do now was to pick a time. I chose a Saturday afternoon once again because the house was again usually quiet and there was less chance of being disturbed. I also put a big note on the fridge door again warning people that I would not be available on my declutter day at the specified time. Then I went and had a sit down and that nice cup of tea that I loved so much.
Step 5 – A new start
Making your drawers fit your life
On the day, make sure you have good sized clean and clear space to work from. I used my bed as my clear space and put my bin bags on the floor which meant I had enough room to work and I could keep on top of everything. I also had plenty of water on hand in case I needed a break at any point.
Your first decision
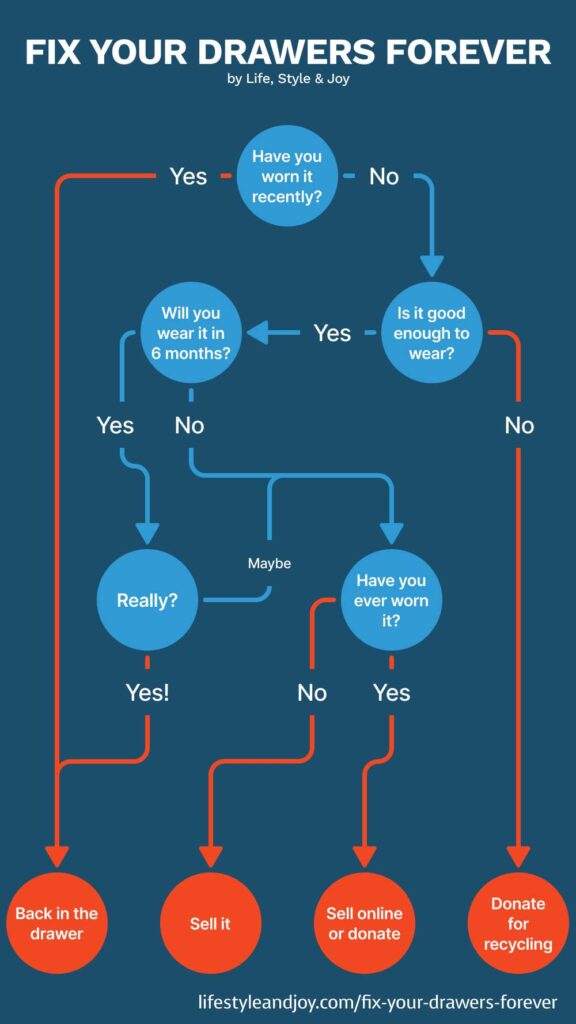
To begin I decided to take one drawer out at a time and place it in the middle of my bed. Next I took everything out and piled it up on one side of the empty drawer. I found it best to deal with item at a time and decide which of the following categories best fit its current state:
- Still wearing – these items were ‘keep and use’ and would back into the drawer
- Unwearables – these items went straight into the orange bin bag on the floor
- No longer wear – these items went in the blue bin bag on the floor
- Never been worn – these items either went back in the drawer to be used or they went straight into the grey bag on the floor, if I thought they were never going to be worn at all
- Miscellaneous items – Put on one side if you want to keep
If I was not sure about wearing anything, I quickly tried it on to help me decide. The trick is to really be honest with yourself or it won’t work. If it doesn’t fit you now then you are probably not going to wear it and telling yourself that you should hold onto it in case it does one day won’t help you declutter at all.
Clutter is all the things we hold on to that we really don’t need.
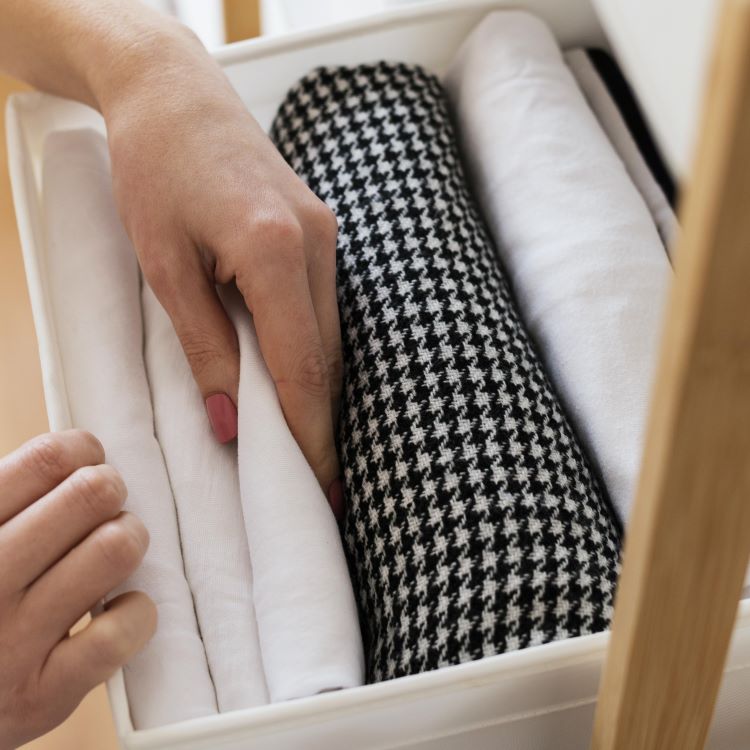
Once I had gone through the contents of one drawer, I took everything that I was keeping, refolded and organized it into new piles according to my new four categories. Then the empty drawer went back in place.
Now you are ready to take the next drawer out and repeat the process again. When you have been through every drawer they should all be empty and ready to fill in your new order and should work much better for you. You should also be left with 2 or 3 bags of unwanted and organised clothes. If you have done it right, your drawers should be less full and less cluttered and also contain only items you need and wear on a regular basis.
I then took the unwearables in the orange bin bag and the wearables in the blue bin bag to the charity shop. They get money for recycling the unwearables by weight and they sold the wearables in the shop. You could sell the wearables online yourself instead, it’s up to you. For the never been worn items in the grey bin bag, you can put them back out into the world and help support sustainable fashion.
Miscellaneous items
Now you are ready to look at these. If you have gone through the process and decided not to keep any of them you will have less to deal with now. These items should be items that you don’t need on a regular basis. You want somewhere else to store these, a less immediate place like the bottom drawer. It is going to be better to reserve prime spots like top drawers for the most used and needed items.
Taking back my life
This was my story and this was how I took on my drawers for an easier better life. Now you are ready to take on yours. I wish you good luck on your declutter day. Remember, preparing yourself and having a solid plan will help you succeed. We all live slightly different lives and have slightly different routines, so start in a way that best suits you.
How this changed my life – being free of mess
Just like my wardrobe, my drawers are now always tidy and contain only what I need and use the most. The main difference is that I can always find what I am looking for without any hassle. Like my wardrobe, I no longer have that stress feeling every time I open my drawers to get something out and I have plenty of room to put things back. It also almost takes care of itself now. I am completely hassle free and I love it.
The time I save now is again unbelievable. Just like my wardrobe, I no longer have to look at mess and I no longer have to tidy up over and over again, because I no longer make any. The best thing is that as well as reclaiming my wardrobe and my drawers back I have reclaimed even more personal time. I have even more free time to myself. I was really not expecting that.
Good luck with your wardrobe challenge and starting your new hassle free life.